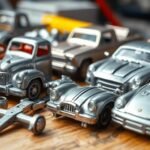
I’ve always been fascinated by how diecast cars are made. From the early 20th century to today, the process has changed a lot. It’s captured the hearts of many collectors over the years.
My journey into diecast cars started with a visit to a local factory. I saw the detail and skill that goes into each model. It was amazing to watch the process from start to finish.
I’ve learned a lot from experienced collectors and makers. I know about different alloys and how to paint and detail models. I’m excited to share this knowledge with others.
This article will guide you through making diecast cars. We’ll cover everything from the basics to advanced techniques. Whether you’re new or experienced, I hope you find this helpful and inspiring.
Key Takeaways:
- Diecast cars have a rich history dating back to the early 20th century, with their popularity peaking in the 1960s.
- The diecast car manufacturing process involves a combination of metal casting, precision molding, and meticulous assembly.
- Understanding the properties of different diecast alloys is essential for creating high-quality, durable replicas.
- Mastering the art of painting and detailing is crucial for bringing diecast cars to life and capturing the essence of their real-world counterparts.
- Connecting with the diecast car collecting community can provide invaluable insights, inspiration, and opportunities for collaboration and knowledge sharing.
Understanding Diecast Materials
As a collector of diecast cars, I’ve learned that knowing the materials used is key. Diecast metal, the main material, includes various alloys. Each alloy has its own benefits and characteristics.
What is Diecast Metal?
Diecast metal is a mix of metal alloys used to make diecast cars. Zinc and aluminum are the most common. They’re strong, can be shaped easily, and are light. These traits help in making detailed, small models that look like real cars.
Types of Diecast Alloys
The main alloys for diecast cars are:
- Zinc alloy for diecast: Zinc alloys are strong and great for small details. They’re often used for models like 1:64 and 1:43 scales.
- Aluminum diecast: Aluminum alloys are lighter and very durable. They’re used for bigger models, like 1:18 and 1:24 scales, where keeping the model light is important.
Advantages of Using Diecast
Diecast materials have many benefits for making small vehicles:
- Strength and durability: Diecast metal keeps models safe from damage.
- Precision and detail: The alloys can be shaped well, making models look very real.
- Longevity: With the right care, diecast models can last for years, keeping their value.
The choice of diecast alloy greatly affects the model’s quality and look.
Knowing about different diecast materials helps collectors choose better. It lets them see the skill that goes into making these tiny wonders.
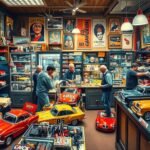
Essential Tools for Making Diecast Cars
As a diecast car enthusiast, I know the right diecast tools are key for top-notch models. Whether you’re new or experienced, a good tool kit is crucial. It makes a big difference in your final model.
Basic Tool Kit Overview
First, you’ll need some basic tools. These include:
- Pliers
- Wire cutters
- Files
- Screwdrivers
- Hobby knife with various blade numbers
- Sanding sticks in different grits
These tools help with removing parts, cleaning up, and assembling your car. Use Tamiya side cutters for clean cuts. For delicate parts like windows, a hobby knife is safer.
Advanced Tools You Might Need
As you get better, you might want more advanced tools. These help with finer details and better finishes. Some examples are:
| Tool | Purpose |
|---|---|
| Dremel | Sanding, polishing, and drilling |
| Airbrush | Applying even, smooth paint coats |
| Pin vise | Drilling holes in small parts |
| Bondo Glazing & Spot Putty | Filling gaps and imperfections |
You’ll also need paints, primers, and metal casting equipment for your project. Use hobby-specific paints like Tamiya or Vallejo. If you’re making custom parts, you’ll need mold making tools.
Specific room temperatures are required for spray paints to be applied well on model cars.
Quality diecast tools are essential for precise, durable, and beautiful models. With the right tools and patience, you’ll create amazing diecast cars.
Designing Your Diecast Car Model
Creating a unique diecast car starts with design. As a diecast car enthusiast for over 20 years, I’ve found that inspiration is key. Look at real cars, photos, and other models to spark your creativity.
Inspiration and Research
Before you start designing, do your research. This ensures your design is accurate and true to the original car. Focus on the following:
- Dimensions and proportions
- Key features and design elements
- Color schemes and liveries
- Historical context and significance
Sketching Your Design
With a clear vision, start sketching. Your sketching techniques are crucial here. Begin with rough outlines, focusing on the car’s shape and size. As you refine, pay attention to these details:
| Design Element | Considerations |
|---|---|
| Body Lines | Ensure smooth and accurate curves |
| Wheels and Tires | Choose appropriate sizes and styles |
| Interior | Include key features and details |
| Decals and Livery | Plan placement and design for visual impact |
A well-planned design is essential for the manufacturing process. Take your time to perfect your sketches. With a solid design, you’re ready for the next step in creating your custom diecast car.
Preparing the Diecast Materials

Getting your diecast materials ready is key to a top-notch final product. First, you need to cut and shape the metal parts to fit your design. Then, clean and prep the surfaces well.
For metal cutting techniques, you’ll use saws, files, and grinders. A 1/4 inch blade on a bandsaw works well for cutting out the cars. But, a 1/8 inch blade offers more precision. Your goal is to shape the metal just right.
Cutting and Shaping Metal
Here are some tips for cutting and shaping your diecast materials:
- Choose the right blade size for your precision needs
- Take your time for clean and accurate cuts
- Use files and grinders to smooth out edges
- Always check your metal against your design sketches
Cleaning and Prepping Surfaces
After cutting and shaping, it’s time for surface preparation for casting. Clean the surfaces well to remove dirt, debris, or oils that could mess up the casting.
Effective cleaning and prepping methods include:
- Use a degreaser or solvent to remove oils
- Sand the surfaces with fine-grit sandpaper for a smooth finish
- Blow away dust or debris with compressed air
- Handle the cleaned parts with gloves to avoid oils from your skin
Proper material preparation is essential for achieving high-quality results in the final diecast car.
By carefully cutting, shaping, cleaning, and prepping your materials, you’re on the right path. Remember, the quality of your final product depends a lot on how well you prepare your diecast material prep.
Creating the Mold for Diecast Cars
Making a top-notch mold is key for detailed and precise diecast cars. The mold-making journey includes picking the right materials and crafting the mold with care. With the right methods and focus on details, you can make molds that produce amazing diecast models.
For diecast mold making, silicone is a top pick. Oomoo 30 is a favorite because it’s affordable and simple to use. It needs equal parts of two components mixed before pouring.
It’s vital to get rid of air bubbles in the mix. You can use a vacuum chamber or pour the silicone slowly to let bubbles out. These steps help make a mold without bubbles.
Types of Molds
There are many mold types for diecast making, each with its own benefits:
- Silicone molds: Flexible, durable, and captures fine details well.
- Rubber molds: Similar to silicone but may not last as long.
- Plaster molds: Good for simple shapes but not as detailed as silicone or rubber.
Step-by-Step Mold Creation
The two-part mold process is common for making diecast molds. Here’s how to do it:
- Make a master pattern of your diecast car design.
- Get the mold box ready and put the master pattern inside.
- Mix the silicone 1-to-1 and pour it into the mold box.
- Let the silicone cure fully before taking out the master pattern.
- Do the same for the second half of the mold.
When casting your diecast car, use a resin with a 1-to-1 mixing ratio. Just like with silicone, degas the resin before pouring. This helps avoid air bubbles and ensures a clean, detailed cast.
| Material | Mixing Ratio | Curing Time |
|---|---|---|
| Oomoo 30 Silicone | 1:1 | 6-8 hours |
| Casting Resin | 1:1 | 24-48 hours |
By following these steps and focusing on details, you’ll make high-quality molds for your diecast car collection.
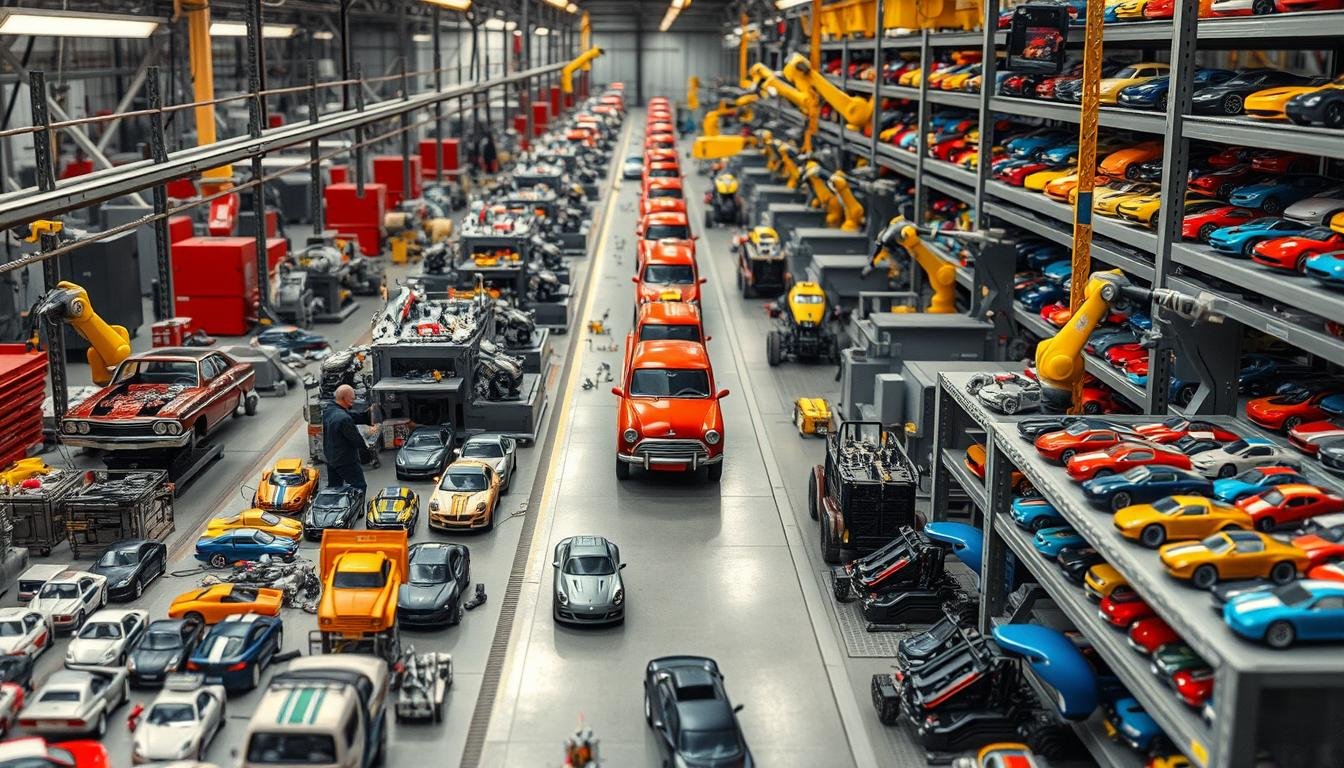
The Diecasting Process Explained
Diecasting is key in making diecast cars. It lets fans get detailed and accurate models of their favorite vehicles. The process heats an alloy until it melts, then pours it into a mold. Let’s explore the pouring and cooling steps.
Pouring the Metal
The metal pouring technique is vital in diecasting. The temperature and pouring method must be just right. This ensures the metal spreads evenly and avoids defects.
Special equipment helps keep the pouring consistent. This leads to high-quality results.
- Aluminum alloys like A380 and ADC12 are light and resist corrosion. They’re great for car parts, aerospace, and electronics.
- Magnesium alloys such as AZ91D and AM60B are very light and somewhat resistant to corrosion. They’re perfect for car parts, electronics, and aerospace.
- Zinc alloys like Zamak 3 and Zamak 5 have excellent casting and precision. They’re good for electrical parts, small products, and car parts.
Cooling and Setting Times
After pouring, the metal needs to cool and set. Cooling methods for diecast depend on the casting’s size and alloy. Some use cooling chambers, while others cool with air or water.
The setting time for castings is also important. It can take seconds to minutes for the metal to solidify. The alloy, mold temperature, part thickness, and ambient temperature all affect this time.
| Factor | Impact on Setting Time |
|---|---|
| Alloy composition | Different alloys have varying melting points and solidification rates |
| Mold temperature | Hotter molds slow down the cooling process, increasing setting time |
| Part thickness | Thicker parts require more time to cool and solidify completely |
| Ambient temperature | Higher ambient temperatures can prolong the cooling process |
By controlling these factors, makers can improve the diecasting process. This results in detailed diecast cars that fans will love for years.
Detailing Your Diecast Cars
Detailing your diecast cars is a fun way to show off your creativity. You can use diecast painting methods, decal application tips, and weathering techniques to make them look real. It’s a great way to turn your models into amazing pieces.
Painting Techniques
There are many ways to paint your diecast cars, like airbrushing, spray painting, or brush painting. Each method gives different results. I like using Meguiars products because they work well.
Meguiars Rubbing and Polishing compounds help remove small flaws and make surfaces smooth for painting. When using rubbing compound, I spend 30 seconds on each panel with a circular motion. It’s important not to let it dry on the surface. I work on one panel at a time and wipe off excess with a microfiber cloth to avoid swirl marks.
Adding Decals and Finishing Touches
Decals are great for adding real details like liveries and logos. When putting on decals, a small amount of Meguiars NXT TechWax 2.0 Liquid wax helps them stick. A single drop can cover a quarter of a diecast car.
After applying wax, I let it haze for 30 seconds to a minute before wiping it off with a Meguiars Supreme Shine Microfiber Cloth. For cleaning plastic windows, I spray Meguiars NXT Glass Cleaner onto a cloth section before wiping the surface.
Weathering techniques, like dry brushing or washes, can create a realistic, aged appearance that brings your diecast cars to life.
To see how well you’ve detailed your cars, compare the gloss on different panels. With time and effort, you’ll make stunning models that show your love for the hobby.
Assembling Your Diecast Car

Assembling a diecast car is a fun and detailed process. It needs patience, precision, and attention to detail. Once you have all the parts, you can start to see your car come to life.
Component Integration
The first step is to put all the parts together. This means fitting each piece carefully, making sure they align and connect well. Some parts might need trimming or adjustments for a perfect fit. It’s important to be careful and take your time.
You’ll need some tools for assembling your diecast car. A 3/16 drill bit and a 1/16 drill bit are useful for taking apart cars. Epoxy or tiny #2-56 model screws are good for putting things back together. Screws make it easier to change things later, while epoxy is strong and dries fast.
Final Adjustments for Diecast
After assembling, you’ll need to make some final adjustments. This might include adding wheels, tweaking the suspension, or making other small changes. These details can really bring your diecast car to life and show off its beauty.
Here’s a table comparing some common diecast car scales and their typical assembly methods:
| Scale | Assembly Method |
|---|---|
| 1:18 | Screws or epoxy |
| 1:24 | Screws or epoxy |
| 1:43 | Epoxy |
| 1:64 | Epoxy |
The secret to successful diecast car assembly is patience and precision. Take your time and enjoy the journey of creating your miniature masterpiece. With practice, you’ll make stunning diecast cars that show your love for this hobby.
Troubleshooting Common Issues
Even with great effort, you might face problems when making diecast cars. Issues like surface imperfections and alignment problems are common. But, with the right knowledge and patience, you can solve these problems and make amazing models.
Addressing Surface Imperfections
Problems like bubbles, pits, or rough spots can ruin your diecast car’s look. Luckily, there are ways to fix these issues:
- Sanding: Use fine-grit sandpaper to smooth out small defects. Be gentle to avoid making it worse.
- Filling: For bigger problems, use metal filler or putty. Let it dry and then sand it down.
- Re-casting: For really bad defects, you might need to make a new mold and cast it again.
Using these methods, you can make your diecast cars look perfect.
Fixing Alignment Problems
Alignment issues happen when parts don’t fit right, making the model look bad or not work well. Here’s how to fix them:
| Issue | Solution |
|---|---|
| Misaligned components | Adjust the parts carefully until they fit right. Use a file or sandpaper for small tweaks. |
| Poor fit due to warping | Warm the warped part with a heat gun or hair dryer, then shape it. Let it cool before putting it back together. |
| Incorrect mold design | If the mold is the problem, you might need to change the mold design and cast again. |
By fixing alignment issues, your diecast cars will look and work great.
Success in diecast making comes from patience and detail. Take your time and try different fixes until you get it right.
Even experts face problems sometimes. Learning to solve common issues will help you make top-notch models you can be proud of.
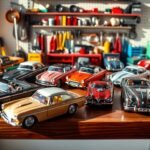
Caring for Your Diecast Collection
As a diecast car enthusiast, I know how vital care and maintenance are. Diecast models can increase in value over time. Keeping them in top shape is key to impressing collectors.
Dust can dull the look of diecast models. So, cleaning them regularly is a must to keep them looking great.
Cleaning and Maintenance Tips
There are different cleaning levels for diecast models. These include light dusting, general cleaning, and deep cleaning. Before cleaning, I check the model’s condition. This helps me decide the right cleaning method.
For light dust, a microfiber cloth or dust blower works well. For tougher stains, I use mild soapy water and a soft-bristle brush. For a deep clean, a bath in lukewarm water with mild soap is sometimes needed. Always dry them well to avoid rust.
Storage Solutions for Your Models
Storing diecast models right is as important as cleaning. I store them at room temperature to protect the paint and wax. Before storing, I apply a wax coat to prevent dust and protect the paint.
I avoid storing them in places like lofts, basements, or garages. These areas can have extreme temperatures and moisture levels. Instead, I keep them in display cases or cabinets in my home’s main area. This protects them from sunlight and heat.
To keep my collection safe, I wrap the model boxes in acid-free tissue paper. I change it at least once a year to prevent discoloration.
By following these cleaning and storage tips, my diecast collection stays in perfect condition. Regular care and careful storage help preserve these miniature art pieces for future collectors.
FAQ
What tools do I need to start making diecast cars?
What types of alloys are commonly used in diecast car production?
How do I create a mold for my diecast car?
What painting techniques can I use to detail my diecast cars?
How can I troubleshoot common issues that arise during the diecast car manufacturing process?
What are some tips for maintaining and storing my diecast car collection?
Source Links
- A Guide To Diecast Cars: Determining Value and Tips – Bodnar’s Auction | bodnarsauction.com – https://www.bodnarsauction.com/a-guide-to-diecast-cars-determining-value-and-tips/
- Common Mistakes to Avoid in Diecast Car Collecting – Darlington Diecast – https://www.darlingtondiecast.co.uk/2023/11/13/common-mistakes-to-avoid-in-diecast-car-collecting/?srsltid=AfmBOooDg_oYoHwqh-BZiuqEBVSZB2vjQFNxQ-2D4Oda6XPNPkagGA0o
- Wait, is diecast collecting boring now? – https://lamleygroup.com/2020/06/18/wait-is-diecast-collecting-boring-now/
- How Are Toy Cars Made: From Concept To Creation – https://www.tinytown.in/blogs/news/how-are-toy-cars-made?srsltid=AfmBOoqIg10RGnLcNYtfwdMfwyvv6_Tg5fETUAcvEABljXdLP4TLr46g
- How to Modify a Die-Cast Car – https://www.instructables.com/How-to-Modify-a-Die-Cast-Car/
- How are diecast models made? – https://minimodelshop.com/blog/mini-models-how-are-diecast-models-made?srsltid=AfmBOorqWTQVWTyc-rDrB0AnZKLFviEj1KY3tkMIYaXHnxk4ucSHRbxG
- A beginner’s guide to building plastic model car kits – https://finescale.com/how-to/2023/05/a-beginners-guide-to-building-plastic-model-cars
- Tips and Tricks for Building Model Cars – DeAgostini Blog – https://blog.deagostini.com/2023/03/how-to-build-car-model/
- A Guide to Master Diecast Car Customization – https://lasertransfersupplies.com/blogs/articles/guide-to-master-diecast-car-customization
- How to make a 1/24 custom start to finish – https://www.diecastcrazy.com/threads/how-to-make-a-1-24-custom-start-to-finish.88775/
- Make Your Own Model Cars and Save a Bundle! – https://www.instructables.com/Make-Your-Own-Model-Cars-and-Save-A-Bundle/
- How Are Toy Cars Made: From Concept To Creation – https://www.tinytown.in/blogs/news/how-are-toy-cars-made?srsltid=AfmBOooiH9qe8jF99z-u31cFsByKD1fOodhBzpo23nCFDTJg72RugNef
- What is Die Casting? Overview, Materials, Process, & Application | Fictiv – https://www.fictiv.com/articles/what-is-die-casting-overview-materials-process-application
- How to Mold and Cast an Action Figure (or Anything Else) – https://www.instructables.com/How-to-mold-and-cast-an-action-figure-or-anything-/
- The Manufacturing Process: How Are Diecast Model Cars Made? – https://livecarmodel.com/blog/the-manufacturing-process-how-are-diecast-model-cars-made/?srsltid=AfmBOoq91gPcfrVQ3TgLV_4iOZruiJOjpHthGkdTxqEOczJeRb8GqAEq
- Die Casting Overview: Process, Materials | Xometry Pro – https://xometry.pro/en/articles/die-casting-overview/
- Detailing your Diecast – https://www.diecastxchange.com/threads/detailing-your-diecast.59785/
- How To Polish and Wax Your Diecast Model Cars – https://livecarmodel.com/blog/how-to-polish-and-wax-your-diecast-model-cars/?srsltid=AfmBOooTx4gClBdR0Fx3ghZ5vwX6ql1CJRu0wcZAx7Bxqpb-S_cCm44U
- The Manufacturing Process: How Are Diecast Model Cars Made? – https://livecarmodel.com/blog/the-manufacturing-process-how-are-diecast-model-cars-made/?srsltid=AfmBOooYVAO4rSR_ArAC-y8GjdSpYhv3MnxZF09tICLunsy5yr4qZj-8
- How Are Toy Cars Made: From Concept To Creation – https://www.tinytown.in/blogs/news/how-are-toy-cars-made?srsltid=AfmBOorOgcAlYvlPWxN4i2leT35ST-qPd5ivLOjAsp4JLajFxZ03hdt_
- Beginner’s guide to modifying cars – https://www.redlinederby.com/topic/beginners-guide-to-modifying-cars/3311
- Troubleshooting Common RC Car Issues: Battery, Motor, Drivetrain Solutions – https://www.exbonzai.com/blogs/news/troubleshooting-common-rc-car-issues
- Traxxas Repair: Troubleshooting Tips for Solving the Most Common RC Car Issues – https://www.rcsuperstore.com/blog/-traxxas-repair-troubleshooting-tips-for-solving-the-most-common-rc-car-issues/?srsltid=AfmBOop6QWFABj1w-puONx_K3Hax_46UtvHfA0VWsQtW9Y8tnGzQfh9T
- The Most Common RC Car Problems and How to Fix Them – https://bezgar.com/blogs/news/the-most-common-rc-car-problems-and-how-to-fix-them?srsltid=AfmBOor3AlX75lgQi7jBrRxceuQ5e7fdUj5WrDn2nYjBEiH8gPOIcM56
- How to Clean & Preserve Diecast Scale Models – https://www.autoworldstore.com/blogs/tips-tricks/cleaning-diecast-models?srsltid=AfmBOopluG2yVAZ7wtVqCtZt5ot7a-LjGlHme8AKTA5Bk4pjGFB-tjrP
- How To Care For Your Diecast Collection To Keep It Looking New – https://www.carandbike.com/news/how-to-care-for-your-diecast-collection-to-keep-it-looking-new-2951690
- Model Care – https://diecastmodelcentre.co.uk/pages/model-care?srsltid=AfmBOopiNsm3LXY-kHudxRij_6Rs8VYiqMc2d0AT56zBsRotepwxRPLw