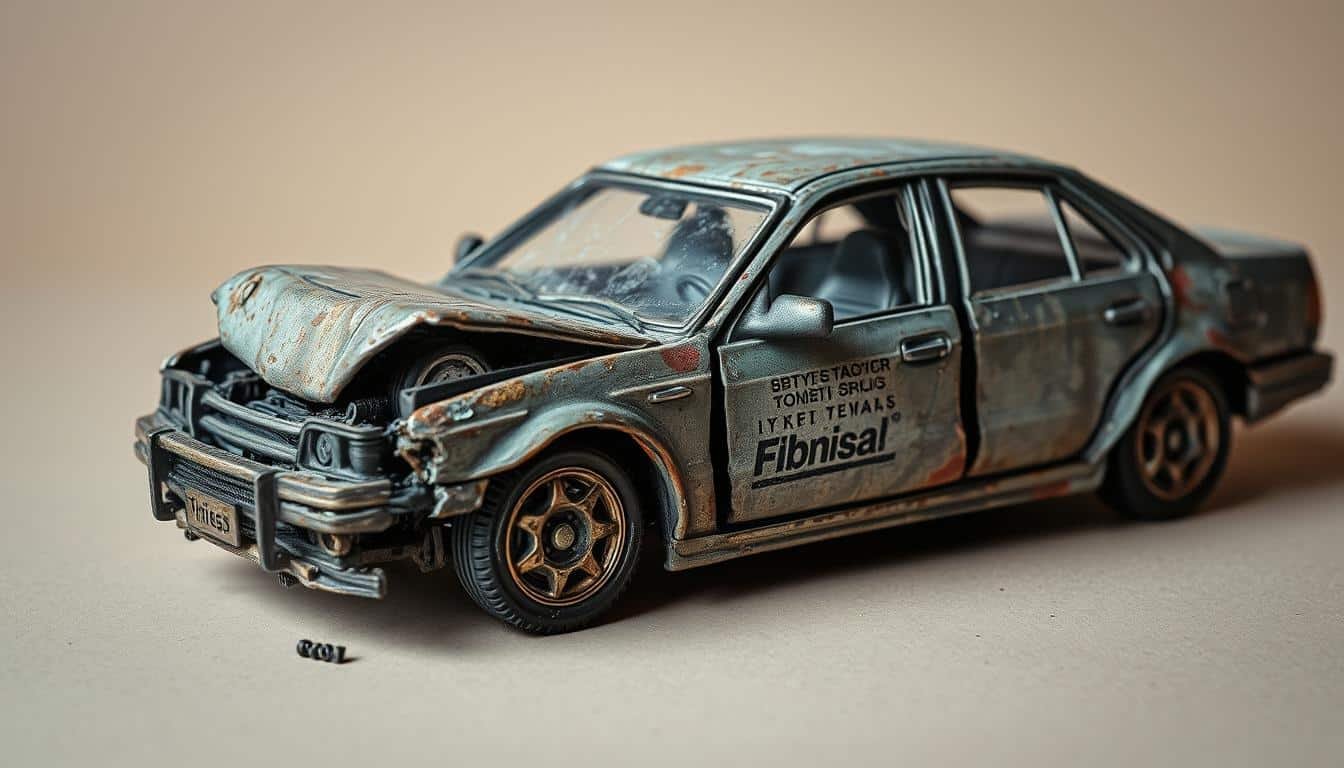
Impaired driving is involved in 40% of fatal crash reports assessed by prosecutors1. This fact underscores the need for road safety awareness. Creating wrecked car diecast models can be an effective educational tool.
This guide teaches you how to make realistic damaged vehicle replicas. You’ll learn expert diecast modeling techniques to craft authentic-looking crash scenes.
This guide covers the entire process of transforming pristine models into crash scenes. You’ll learn how to disassemble your model and add final weathering touches. These skills are useful for standalone projects and larger dioramas.
Key Takeaways
- Learn to create realistic wrecked car diecast models
- Master diecast modeling techniques for damage effects
- Discover how to craft custom crash scene dioramas
- Explore weathering and detailing methods for authenticity
- Understand the educational value of recreating accident scenes
- Gain insight into the importance of road safety awareness
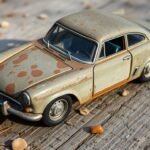
Our 27-step process provides detailed instructions for your wrecked car diecast model2. You’ll learn to add burnt hedges, fire damage, and weathered looks. These elements create an authentic post-accident atmosphere.
Mastering these techniques allows you to visually represent road safety issues. Crash data is vital for understanding road trauma’s impact3. Your models can help bring this data to life.
Essential Tools and Materials for Creating Wrecked Diecast Models
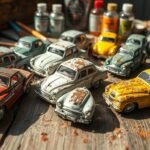
Creating realistic wreckage dioramas needs specific tools and materials. The right equipment is key for authentic results in junked car miniatures or crashed automobile sculptures.
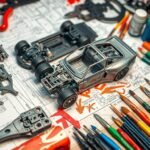
Required Basic Tools and Equipment
Your wrecked diecast model project needs various tools. These include a Dremel, cordless drill, small screwdrivers, and dental pick set.
You’ll also need a needle file set, tweezers, and various pliers4. A magnifying lamp and spring clamps help with precise work.
Paint Selection and Weathering Materials
The right paints are crucial for realistic effects. Acrylic paints, weathering washes, and rust effect paints are essential for detailing.
You’ll need super glue, two-part epoxy, and sandpaper for various tasks4. These supplies help create authentic-looking collision simulation models.
| Paint Type | Use | Recommended Brand |
|---|---|---|
| Acrylic | Base colors | Tamiya |
| Weathering Wash | Dirt and grime effects | Flory Dark Dirt |
| Rust Effect | Corrosion simulation | MIG Rust Sticks |
Specialized Modeling Supplies
For added realism, use rubberized horsehair for vegetation and sea foam for trees. Layering sprays can help achieve depth in your dioramas.
Some modelers use 3D printing services like Shapeways for custom parts. These extras can make your crashed automobile sculptures more lifelike.
Safety Equipment and Workspace Setup
Safety should be your top priority when working on junked car miniatures. Ensure you have a well-ventilated workspace, especially when using paints or solvents.
Protective eyewear and gloves are essential when operating tools or handling chemicals4. Remember, safety is as important as skill in creating realistic wreckage dioramas.
How to Make Wrecked Car Diecast Model

Smashed vehicle collectibles are gaining popularity among hobbyists. Scott Fuller’s customized wrecked car diecast models have a strong following. Some of his creations sell for over $300 each5.
Disassembling the Diecast Vehicle
Begin by carefully taking apart your diecast model. Remove screws and separate all components. This step is key for accessing the model’s areas.
It prepares the model for transformation into a custom diecast crash scene.
Creating Realistic Damage Effects
Use sanding techniques and heat applications for authentic-looking damage. A soldering iron can create melted tire effects. Scott’s weathering techniques come from trial and error.
Applying Rust and Burn Effects
Use special paints and weathering products for rust and burn effects. Build layers to increase realism. Color combo and detail level affect collectability5.
Interior Detailing and Weathering
Pay attention to interior details for enhanced realism. Create burnt metal effects and charred upholstery. Scott’s detail work is so good, some models look like actual damaged cars5.
Glass and Component Damage Techniques
Use table salt fixed with layering spray to simulate broken glass. Apply airbrush techniques for smoke and fire damage on the body.
Add deflated tires, cracked windshields, and bent panels to complete the wrecked look.
| Technique | Materials | Effect |
|---|---|---|
| Heat Application | Soldering Iron | Melted Tires |
| Layering | Specialized Paints | Rust and Burns |
| Salt Technique | Table Salt, Spray | Broken Glass |
| Airbrushing | Airbrush, Paints | Smoke Damage |
These techniques help create unique smashed vehicle collectibles. Scott’s custom wrecked diecast models offer a distinctive piece. They stand out from traditional limited edition models5.
Conclusion
Creating wrecked car diecast models is a fascinating hobby. It combines artistic skills with meticulous attention to detail. By mastering these techniques, you can transform miniature vehicles into stunning custom crash scenes.
This guide helps you craft realistic wreckage dioramas. These scenes showcase the aftermath of vehicular accidents. As you improve, consider the real-world impact of vehicle safety design.
In a crash test challenge, students explore collision outcomes. This mirrors research by automotive safety experts. Motor vehicle collisions cause 1.3 million deaths annually worldwide6.
Your diecast creations can spark important talks about vehicle safety. Full-scale crash tests provide insights into occupant movement during collisions7. Apply these principles to your diecast modeling techniques.
Create custom crash scenes that look impressive and educate viewers. Remember to prioritize safety when working with tools and materials. Let your creativity guide you in crafting unique wreckage dioramas.
FAQ
What are the essential tools needed to create a wrecked car diecast model?
How do I create realistic damage effects on my diecast model?
What’s the best way to simulate broken glass on a wrecked car model?
Can I use 3D printing for custom parts in my wrecked car model?
How do I create a burnt-out car diorama?
What safety precautions should I take when creating wrecked car models?
How can I add realistic vegetation to my wrecked car diorama?
Source Links
- Crash Reconstruct monoV3 – https://ndaa.org/wp-content/uploads/Crash-Reconstruction-Basics.pdf
- Burnt out car making a scene – https://www.keymodelworld.com/article/burnt-out-car-making-scene
- PDF – https://www.carecprogram.org/uploads/Crash_Investigation_and_Reporting_Guide_20211412_EN.pdf
- Restoration Handbook – The Vintage British Diecast Forum (VBD3) – http://www.vbd3.co.uk/viewtopic.php?t=29
- Scott Fuller’s custom-wrecked model cars – https://www.streetmachine.com.au/features/scott-fuller-custom-wrecks-model-cars
- Creative Engineering Design: Creative Crash Testing Design Challenge – Activity – https://www.teachengineering.org/activities/view/ced-2678-creative-crash-testing-car-challenge-activity
- Use of Crash Test Dummies in reenactment for a litigation case – McHenry Forum – https://www.mchenrysoftware.com/board/viewtopic.php?t=2233

Interesting article but why are we glorifying wreckage? Isnt it better to teach restoration of diecast models instead of destroying them? Just a thought.
Not convinced! Why waste time wrecking a perfect diecast model? Isnt it more skillful to restore them instead of destroying them?
Interesting guide, but isnt it a bit counterintuitive to deliberately wreck a perfectly good diecast model? Whats the artistic value in that?
Interesting guide, but wouldnt an airbrush provide more realistic weathering effects compared to brushes? Just a thought!
So, isnt rust effect crucial for wrecked diecast models? Surprised it wasnt discussed in the weathering section!