How to Photograph Diecast Model Cars Like a Pro
Affiliate links — we may earn a commission
Ever wondered how pros capture the details and reflections of diecast model cars? Miniature car photography is an art that combines the challenges of real-world car photography but on a smaller scale. It involves understanding lighting, reflections, and perfect composition.
In this guide, we’ll share the secrets to photographing diecast model cars like a pro. Whether you’re experienced or new, you’ll learn the key equipment, setup, and techniques. These will help take your scale model car photography to the next level.
Key Takeaways
- Understand the unique challenges of photographing diecast model cars, such as capturing intricate details and reflections.
- Learn about the essential equipment, including cameras, lenses, tripods, and lighting setups, to achieve professional-grade results.
- Discover the importance of proper model car preparation and cleaning for optimal photographic results.
- Explore advanced photography techniques, such as aperture control and shutter speed, to enhance depth of field and capture stunning images.
- Gain insights into composition and angle selection to showcase the unique features and design of your scale model cars.
Essential Equipment and Setup for Model Car Photography
To take amazing photos of your diecast model cars, you need the right tools and a good setup. Choosing the right camera, lens, backdrop, and lighting is key. Each part is important for top-notch photography tips.
Camera and Lens Selection
A DSLR camera gives you the most control, but a good point-and-shoot can also work. A 50mm prime lens is great because it avoids distortion. It helps capture the small details of your model cars.
Tripod and Remote Shutter Requirements
When taking photos of small things like diecast models, stability is crucial. Get a strong tripod and use a remote shutter release or self-timer. These tools help get sharp, clear photos without blur.
Background Materials and Lighting Equipment
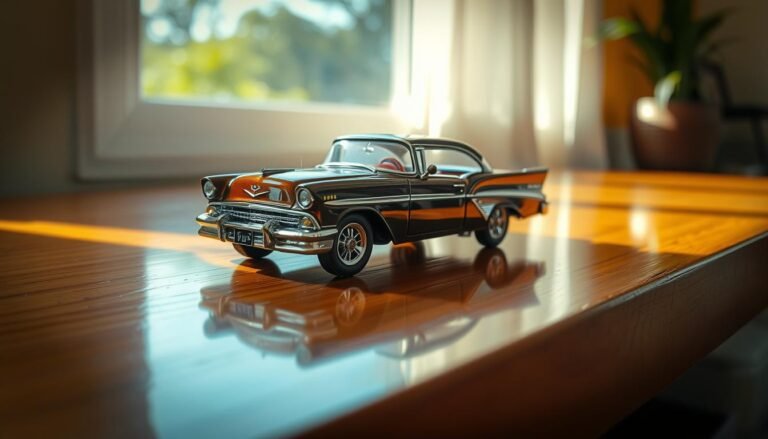
Use neutral colors like white, gray, or tan for your backdrop. This lets the model car stand out without distractions. For lighting for small objects, a three-light setup works best. Use daylight-balanced lamps or natural light to highlight the model’s details.
Getting the right equipment and planning your setup well is key. With the essentials, you’ll take stunning photos that show off your model car’s beauty.
How to Photograph Diecast Model Cars: Preparation and Cleaning
Getting your diecast model cars ready for photos is key. Cleaning and preparing them right can make your images pop. You’ll see every detail and shine of your models. Let’s explore the best ways to prepare and clean your models for top-notch photos.
Start by cleaning your models well. Use Meguiar’s Ultimate Compound for older models with corrosion or rust. Newer ones just need a soft wipe with Tech Wax. Always use soft cloths and brushes to avoid scratches.
Wear gloves to avoid fingerprints. For matte finishes, avoid wax or compound. Place your shoot near a window for natural light, but watch out for direct sunlight.
- Use a plumeau or similar tool to gently remove any remaining dust just before taking your shots.
- Ensure the background and surrounding area are clean and free from distractions that could detract from your model car’s presentation.
By following these steps, you’ll get amazing photos of your model cars. You’ll be ready to show off your miniatures like a pro.
Advanced Photography Techniques and Camera Settings

To take amazing photos of your diecast model cars, you need to learn advanced techniques and camera settings. Understanding aperture, depth of field, ISO, and shutter speed is key. These elements will improve your macro photography skills.
Understanding Aperture and Depth of Field
For sharp focus on your entire model car, use a high f-number like f/22. This maximizes the depth of field, keeping most of the car sharp. For even more sharpness, try focus stacking. This blends multiple images for a deeper depth of field.
Mastering ISO and Shutter Speed
Keep your ISO low, around 100, to reduce image noise and keep details clear. When using a tripod, longer shutter speeds help get the right exposure without losing quality.
Composition and Angle Selection
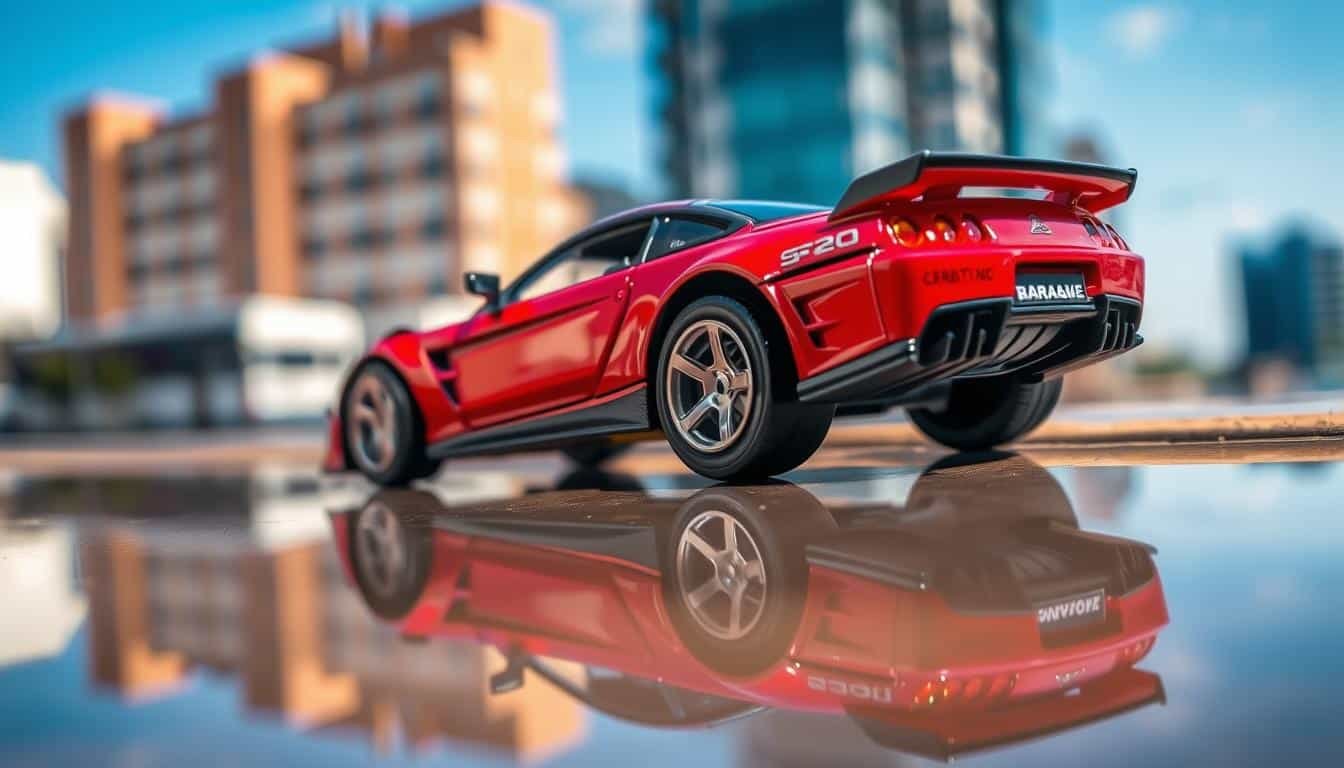
Try different angles to capture your model cars. A three-quarter front view shows the car’s length and details well. Low angles add drama. Always shoot in landscape to show the car’s full length. Get up close to highlight fine details and use the rule of thirds for better compositions.
Choose backgrounds and props that match the scale of your model car. Post-processing can enhance colors, contrast, and fix minor flaws. This improves your photo editing for miniatures and macro photography techniques.
| Technique | Description | Example |
|---|---|---|
| Depth of Field | Use a high f-number (small aperture) like f/22 to maximize depth of field and keep the model car in focus. | 1/24 Ford Mustang on a glass worktop covered in baking soda for a ‘cinematic’ look. |
| Lighting and Shutter Speed | Keep ISO low (around 100) and use longer shutter speeds on a tripod for proper exposure without noise. | 1/36 BMW model with tin foil for water in a photography setting. |
| Composition and Angles | Experiment with three-quarter front views and low angles to highlight the car’s details and create drama. | Sieved flour used in front of a small fan to create a blizzard effect for photography. |
By mastering these advanced techniques, you’ll be able to capture stunning, professional-looking photographs of your diecast model cars. These photos will show off their intricate details and captivating presence.
Conclusion
Photographing diecast model cars needs both technical skill and creative thinking. You must know how to use your camera and pay attention to details. This way, you can take amazing pictures that show off your model car collection.
Remember, getting better at this takes practice and trying new things. This article has given you tips to improve your scale model photography. Whether you’re new or experienced, these ideas will help you take stunning photos of your diecast model cars.
Keep working on your photography skills. With hard work and a focus on details, you can make your models look amazing. Share their beauty with everyone. Happy photographing!
What are the key challenges in photographing diecast model cars?
What essential equipment is required for model car photography?
How should I prepare and clean the model car before shooting?
What camera settings and techniques are recommended for model car photography?
How can I enhance the final images through post-processing?
Source Links
- Car Photography Tutorials – Scale car photography explained in detail – https://www.carphototutorials.com/scale_car_photography_explained_in_detail.html
- Diecast Model Photography: Tips & Tricks – https://diecastsociety.com/diecast-models-photography-tips-tricks/
- Diecast Photography Tutorial – https://www.diecastxchange.com/threads/diecast-photography-tutorial.51467/
- Realistic Toy Car Photography Tutorial – https://adaptalux.com/realistic-toy-car-photography-tutorial/
- Large vintage diecast and resin collection – Cleaning… – https://www.diecastxchange.com/threads/large-vintage-diecast-and-resin-collection-cleaning-question-with-photo-examples.236356/
- How to detail scale models and die-casts like real concours show cars – Hagerty Media – https://www.hagerty.com/media/entertainment/how-to-detail-scale-models-and-die-casts-like-real-concours-show-cars/
- Photo Studio. How to make quality photos of scale models? – https://formula143.org/articles/formula143-collectors-guide/photo-studio-how-to-make-quality-photos-of-scale-models/
- Photographing Scale Model Cars – https://photographylife.com/photographing-scale-model-cars
- Tips On How To Photograph Hot Wheels – https://hotwheels.fandom.com/wiki/Tips_On_How_To_Photograph_Hot_Wheels
- Forensic photography: Prospect through the lens – https://pmc.ncbi.nlm.nih.gov/articles/PMC6080161/
- How to Analyze a Photograph – https://www.instructables.com/How-to-Analyze-a-Photograph/
Mike Callahan
Contributing writer covering diecast cars and figurines.


Does anyone else think professional gear is overrated? Ive snapped some killer diecast shots with just my phone and natural light!
Interesting read, but wouldnt a smartphone camera do the same job? Sometimes, I think we over-complicate things. Just my two cents, though.
Smartphone cameras are convenient, but cant match the quality and control of a DSLR. Simplicity isnt always superior.