As a car enthusiast, I’ve always been drawn to diecast customization. It’s rewarding to turn a plain model into a unique piece. At first, the many techniques and materials seemed overwhelming. But, I learned that preparation and detail are crucial for a great paint job.
In this guide, I’ll show you how to paint diecast cars. We’ll cover everything from picking the right model to adding the final touches. This guide is for both beginners and experienced modelers. It will help you create stunning custom diecast cars.
Let’s appreciate the joy of customizing diecast models. It lets you express your creativity and bring your favorite car colors to life. It’s a great way to show your car passion and make your collection special. With the right tools and techniques, you can get professional results without spending a lot.
Key Takeaways
- Proper preparation is essential for a successful diecast paint job
- Choosing the right paint type and color can make a significant impact on the final result
- Airbrush painting diecast models offers greater control and precision compared to spray cans
- Adding decals and fine detailing can elevate your custom diecast car to the next level
- Experimenting with different techniques and designs is key to finding your unique style
Introduction to Diecast Car Painting
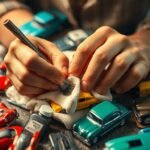
I’ve been into diecast cars for over 20 years. Painting them is a joy that brings me satisfaction. It lets me show off my creativity and make my collection stand out. By using my own paint schemes, I can turn a regular diecast car into a unique masterpiece.
Why Paint Diecast Cars?
Painting diecast cars is rewarding for many reasons. It lets you show off your personal style and tastes. Whether you love classic muscle cars or modern supercars, you can make your collection reflect your favorites.
It’s also a fun hobby that lets you relax and be creative. As you get better, you’ll tackle more challenging projects. This way, you can explore the limits of what’s possible with personalized model cars.
Benefits of Custom Paint Jobs
Custom paint jobs add value to your diecast models. They show off the artist’s skill and vision. A well-painted diecast car can sell for more than a standard one, making it a good investment.
They also let you create models that manufacturers might not offer. If you have a unique design or color in mind, painting your own model is the best way to make it real. With the right tools and skills, you can make endless unique model cars.
Selecting the Right Diecast Car
Choosing the right diecast car to paint is a key step. There are many options, so think about the brand, model type, and paint surface. A good choice will make your painting project fun and successful.
Popular Brands for Diecast Models
Many brands are known for their quality and detail in diecast cars. Some top names include:
- Hot Wheels
- Matchbox
- Maisto
- Auto Art
- Kyosho
These diecast car brands have a wide variety of cars. You can find everything from classic muscle cars to modern supercars. This means you’ll find a model that matches your interests and painting dreams.
Identifying Model Types for Painting
When picking a diecast car for painting, think about the model type. Some models are better for painting than others. Here are some tips:
- Choose models with smooth surfaces for easier painting.
- Avoid models with lots of decals or paint already on them. They might need more prep work.
- Think about the scale of the model. Larger scales (like 1:18) have more room for details.
Some models, like those with opening doors or hoods, need extra care when taking them apart and putting them back together. But, these features can make your painted car look even more real.
| Scale | Pros | Cons |
|---|---|---|
| 1:64 | Compact size, affordable | Limited detailing potential |
| 1:43 | Good balance of size and detail | Fewer brand options |
| 1:24 | Ample space for intricate painting | Requires more paint and time |
| 1:18 | Highly detailed, ideal for showcasing | More expensive, takes up more space |
By carefully choosing a diecast car that fits your painting goals, you’ll create a beautiful custom piece. It will show off your creativity and attention to detail.
Tools and Materials Needed
To start painting your diecast models, you’ll need the right diecast painting supplies. Having the right tools and materials makes the process easier and more fun. Let’s look at what you’ll need to begin.
Essential Painting Tools
You’ll need high-quality paintbrushes in different sizes. Big brushes cover large areas well, while small ones are great for details. Also, have a wire brush, small buckets for water, and sandpaper or sanding sticks to get your model ready.
- Side cutters or clippers for removing parts from the sprue
- Craft knives for precise trimming and removing mold lines
- Tweezers and pliers for handling small parts and applying decals
- Airbrushes and air compressors for advanced painting techniques
Recommended Paint Types for Diecast Cars
There are several paint options. Acrylic lacquer paints are water-based and great for beginners because they’re easy to use and clean up. Enamel paints, which are oil-based, give a glossy finish that looks realistic. Automotive paints, used on real cars, have many shades and finishes to match your diecast model.
| Paint Type | Characteristics | Drying Time |
|---|---|---|
| Acrylic | Water-based, easy to use and clean up | 30 minutes to 1 day |
| Enamel | Oil-based, glossy finish | 1 to 3 days |
| Automotive | Wide range of shades and finishes | Varies by brand |
Apply paint in thin, even coats. Let each coat dry fully before adding more for the best look.
Safety Gear for Painting
Remember safety first! Always wear gloves and a mask to avoid chemical fumes. Paint in a well-ventilated area, especially with spray painting equipment or paint strippers. Good safety gear and a comfy workspace make painting more fun and safe.
Preparing Your Diecast Car for Painting
Before you start painting your diecast car, you need to prepare the surface. This means taking it apart and cleaning it well. This makes sure the paint goes on smoothly and evenly.
Disassembling the Model
First, take your diecast car apart. Remove all parts until you have just the metal shell left. This lets you paint the body without any parts getting in the way. Here’s a table to help you disassemble:
| Step | Description |
|---|---|
| 1 | Remove the screws holding the car together |
| 2 | Gently separate the body from the chassis |
| 3 | Detach any remaining parts, such as windows or mirrors |
| 4 | Store the components in a safe place for reassembly later |
Cleaning the Surface Properly
After you have the metal body, it’s time to get rid of the old paint. Follow these steps to prepare the surface:
- Soak the body in Aircraft Remover paint stripper for 15 minutes to soften the paint.
- Rinse the body with water to remove the loosened paint.
- Scrub away any leftover paint or dirt with a wire brush, leaving the metal bare.
- Sand the body with 320 grade sandpaper, then 600 grade to make it smooth for painting.
Remember, proper surface preparation is key to achieving a flawless paint job on your diecast car. By disassembling and cleaning the body well, you’re ready for a great paint job.
Priming Your Diecast Car
Before you paint your diecast model, you must prime it first. Priming makes the surface smooth for paint to stick to. This ensures your model looks professional and lasts a long time.
The Importance of Primer
Some might think they can skip priming and go straight to painting. But, this can result in poor results. Primer is key for several reasons:
- It helps the paint stick better to the model’s surface
- Primer covers small flaws, making the surface smooth for painting
- It gives a uniform base color, making the paint job look brighter
Experts say that while you can paint without primer, it’s better for sticking and lasting paint.
How to Apply Primer Successfully
To prime your diecast models well, follow these steps:
- Make sure the model’s surface is clean and dry before priming
- Use a bent wire coat hanger to support the car for even coverage
- Apply two coats of flat-gray spray primer, waiting 15 minutes between coats
- When spraying primer, keep about 12 inches (30 cm) away from the model
Remember, the time between primer coats is key. It lets the surface dry properly, which is vital for a good paint job.
| Primer Type | Drying Time Between Coats | Ideal for Diecast Models |
|---|---|---|
| Spray Primer | 15 minutes | Yes |
| Brush-on Primer | 30 minutes | No |
By following these steps and waiting the right amount of time, you’ll get a strong base for your paint job. This will make your diecast model look smooth, even, and last a long time.
Choosing the Right Paint Color
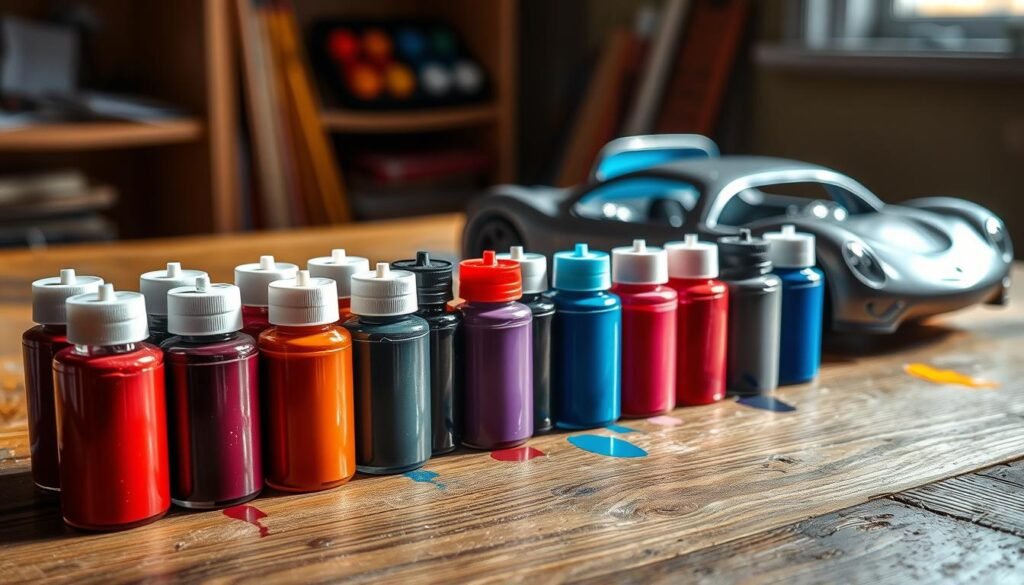
Choosing the right color for your diecast car is key. There are many diecast paint colors out there. Knowing color theory and current trends helps you pick the best one.
Color Theory Basics
Color theory is important for picking colors that look good together. Think about these points when choosing:
- Complementary colors: These are opposite each other on the color wheel, like red and green. They make a strong contrast.
- Analogous colors: These are next to each other on the color wheel, like blue and green. They look cohesive.
- Monochromatic colors: This uses different shades of one color, like various reds. It looks subtle and classy.
Popular Color Choices for Diecast Cars
Some colors are always popular for diecast cars. Here are a few favorites:
| Color | Popularity | Characteristics |
|---|---|---|
| Red | High | Bold, energetic, and grabs attention |
| Yellow | Medium | Bright, cheerful, and catches the eye |
| Silver | High | Sleek, modern, and fits many styles |
| Blue | Medium | Calming, trustworthy, and classy |
| Black | High | Elegant, timeless, and powerful |
When picking paint, think about these:
- Acrylic paints come in many colors and are easy to mix. They dry fast, usually in a day.
- Enamel paints, like Testors, give a glossy look and many car colors. But they take longer to dry, 1-3 days, and have more fumes.
Try different colors and finishes to make your diecast car unique and personal.
By learning color theory and checking out current trends, you can pick the best paint for your diecast car. Whether it’s a classic red, sleek silver, or something custom, the right color makes your model pop.
Painting Techniques for Diecast Cars
There are two main ways to paint diecast cars: spray painting and hand painting. Each method has its own benefits and can lead to amazing results. As someone who loves diecast cars, I’ve tried both and learned a lot.
Spray Painting vs. Hand Painting
Spray painting is fast and gives even coverage. Rustoleum UltraCover 2x is great for this, covering well in one coat and keeping details sharp. Hand painting, using acrylics or enamels, offers more control and precision. Enamels give a smoother finish because they hide brush strokes better than acrylics.
| Paint Type | Drying Time | Base | Durability | Cleanup | Curing Process |
|---|---|---|---|---|---|
| Acrylic | 0.5-1 day | Water | Can peel, less resistant | Warm water | Water evaporation |
| Enamel | 1-3 days | Oil | Long-lasting results | Mineral spirits | Chemical reaction |
Layering Techniques for Best Results
It’s key to layer paint coats carefully, no matter the method. Paint in thin, even layers, letting them dry fully between each one. When hand painting, use different brush sizes for detail and masking tape for clean lines. Always clean the car well before painting to remove dirt and grease. Using a primer helps the paint stick better and prevents chipping.
Waiting at least 12 hours between coats is recommended to avoid issues like cracking or blistering.
By mastering layering paint coats and using the right tools, you can improve your painting skills. This will help you create custom diecast cars that show off your creativity and style.
Adding Detailing to Your Paint Job
After applying the base coat to your diecast car and letting it dry, it’s time for the final touches. You can use diecast decals, custom stickers, or detail painting techniques to enhance your custom paint job.
Decals or Stickers: Which to Choose?
For adding designs or logos to your diecast car, you have two choices: diecast decals or custom stickers. Diecast decals are made for diecast models and last long. They are high-quality and can be applied with water or solvents. But, applying them needs patience and a steady hand for a smooth finish.
Custom stickers are easier to use, especially for beginners. They can be moved around if needed. But, they might not last as long as diecast decals and can peel or fade.
Techniques for Fine Detailing
For more detailed work, try detail painting with fine brushes. This method lets you add custom designs, stripes, or logos by hand. It’s important to use quality brushes and work in a clean, well-lit area.
Here are some tips for detail painting:
- Practice on a spare piece of plastic or metal before painting your diecast car
- Use a magnifying glass or tool to see small details better
- Work in thin, even layers, letting each dry before adding the next
- Apply a clear coat to protect your work once it’s done
By using diecast decals, custom stickers, and detail painting, you can make your diecast car’s paint job stand out. Take your time, be patient, and enjoy trying different designs and techniques.
Topcoating and Finishing Touches
After painting and detailing your diecast car, it’s time for the final step: a clear coat. Clear coating diecast models protects the paint and gives a glossy finish. This section will cover why clear coating is key and how to get a smooth finish.
The Importance of a Clear Coat
A clear coat does several important things:
- Protection: It shields the paint from scratches, chips, and UV damage.
- Enhanced appearance: It makes your diecast car look glossy and polished.
- Durability: It helps your custom paint job last longer, staying vibrant and shiny.
Here are some stats to consider when deciding on a clear coat:
| Statistic | Value |
|---|---|
| Percentage of modelers who find an airbrush/air compressor kit costly | 75% |
| Frequency of difficulties in finding the right colors from canned spray paints | 60% |
| Rate of mistakes made during top coating application | 40% |
Tips for a Smooth Finish
To get a smooth clear coat on your diecast car, follow these tips:
- Choose a high-quality clear coat made for diecast models or cars.
- Apply thin, even layers to avoid pooling or changing the base color. Too much clear coat can yellow light colors, so be careful.
- Let each coat dry fully before adding more, as the manufacturer suggests.
- Spray from 6-8 inches away to get even coverage and prevent drips.
- Work in a well-ventilated area and wear a respirator to avoid harmful fumes.
“A smooth finish is achieved through even application and allowing proper drying time between coats.”
By following these tips and taking your time, you’ll get a professional-looking clear coat. This will protect and enhance your diecast car’s paint job. You’ll end up with a stunning, glossy finish that will impress everyone.
Troubleshooting Common Issues
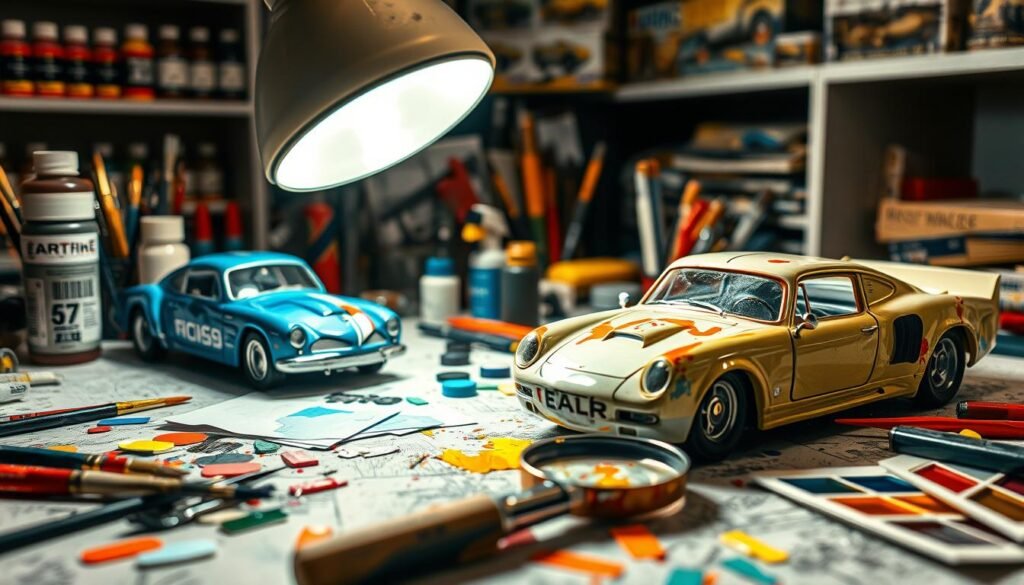
Painting diecast cars can lead to various problems. Issues like uneven coverage and lost details can be frustrating. But, knowing how to fix these problems can save time and effort.
Paint rash is a common problem. It happens when paint is exposed to sunlight, humidity, and chemicals. This can cause bubbles, cracks, and peeling. Direct sunlight and UV rays can also damage the paint.
To prevent paint rash, keep your models in a cool, dry place. Avoid direct sunlight and humidity. Apply a protective coating or wax to shield the paint from UV rays and moisture. Handle your models carefully to avoid scratches.
Fixing Mistakes in Your Paint Job
If you run into painting problems, don’t worry. Many issues can be fixed by stripping the paint and starting over. Here are some common causes and solutions:
| Problem | Causes |
|---|---|
| Bleeding | Contamination on older finish (especially red pigments), wrong thinner/reducer being too slow |
| Blistering | Improper surface cleaning, wrong thinner or reducer, excessive film thickness, contamination of compressed air lines |
| Blushing | Hot humid weather, excessive air pressure, wrong thinner, low temperatures of part, paint, and spray booth air |
| Chalking | Wrong thinner affecting topcoat durability, poorly mixed materials, paint film too thin, excessive mist coats for metallic colors |
| Checking (Line Checking) | Excessive film thickness, improper surface preparation |
| Cracking | Excessive film thickness, poorly mixed materials, insufficient flash time, incorrect use of additive |
| Crazing | Shop being too cold, causing the material to shatter under solvent action |
| Featheredge Splitting | Piling on undercoat, poor mixing of materials, wrong thinner, improper surface cleaning, improper drying, excessive use of putty |
| Fish Eyes | Improper surface cleaning, old finish with embedded silicone, oil contamination of air lines |
| Lifting | Incompatible materials, insufficient flash time, improper surface cleaning, wrong thinner or reducer |
Avoiding Common Painting Errors
To avoid painting mistakes, follow these best practices:
- Apply thin, even coats of paint, allowing proper drying time between each coat
- Work in a clean, well-ventilated area to prevent contamination
- Ensure the surface is properly cleaned and free of residue before painting to prevent cracking and blistering
- Use the correct thinner or reducer for your paint type
- Mix materials thoroughly and avoid excessive film thickness
- Allow sufficient flash time between coats and use additives correctly
Understanding common painting mistakes and how to avoid them can help you achieve a beautiful, lasting paint job on your model cars.
Conclusion and Final Thoughts
In this guide, I’ve shared tips and techniques for painting diecast cars. You’ll learn how to prepare surfaces, prime, paint, and add details. This will help you create professional-looking custom designs for your diecast car collection.
Recap of Key Tips
For the best results, work in a clean, well-ventilated space. Use high-quality tools and materials. Take your time with each step, from disassembling and cleaning to applying primer, paint, and clear coat.
Pay close attention to detail when adding decals or hand-painted elements. These finishing touches can greatly enhance your custom diecast car’s appearance.
Encouragement to Experiment with Designs
Diecast customization lets your imagination run wild. Don’t be afraid to try bold colors, unique patterns, and creative themes. Draw inspiration from your favorite vehicles, iconic liveries, or fictional designs.
The possibilities are endless. The more you practice, the more confident you’ll become in creating unique diecast masterpieces.
Remember, the most important thing is to have fun. Enjoy the process, learn from mistakes, and take pride in your creations. With dedication and a willingness to experiment, you’ll soon have a collection of custom diecast cars that will impress and inspire others.
FAQ
What are the benefits of painting diecast cars?
What brands of diecast cars are best for painting?
What tools and materials do I need to paint diecast cars?
How do I prepare a diecast car for painting?
Is priming necessary when painting diecast cars?
What colors work best for painting diecast cars?
What painting techniques work best for diecast cars?
How can I add detailing to my custom painted diecast car?
Should I apply a clear coat after painting my diecast car?
How can I fix mistakes or avoid common issues when painting diecast cars?
Source Links
- How to Paint Over a Diecast Car: 12 Steps (with Pictures) – https://www.wikihow.com/Paint-Over-a-Diecast-Car
- How to Paint Model Cars: Painting Tips & Guide – https://www.autoworldstore.com/blogs/tips-tricks/guide-to-painting-your-model-car?srsltid=AfmBOopy-jU1X6VSqK5yd4myZHyStqNgSAIqUIcjFDP8Hhewz2AR7Za2
- How to custom paint Hot Wheels diecast cars – https://www.redlinederby.com/topic/how-to-custom-paint-hot-wheels-diecast-cars/1
- Understanding undercoat – https://www.planetdiecast.com/index.php?option=com_kunena&func=view&catid=83&id=28769&Itemid=0
- How to make a 1/24 custom start to finish – https://www.diecastcrazy.com/threads/how-to-make-a-1-24-custom-start-to-finish.88775/
- How to Modify a Die-Cast Car – https://www.instructables.com/How-to-Modify-a-Die-Cast-Car/
- A Detailed Guide to Painting Diecast Car Models – https://livecarmodel.com/blog/a-detailed-guide-to-painting-diecast-car-models/?srsltid=AfmBOorHIsw2j3ruUZxNK2OV0WtniZmGmEe_CBRlY8GVh0fTsqCAw5GZ
- Amalgam Model Car Collection | Perfect Scale Model Cars – https://www.amalgamcollection.com/?srsltid=AfmBOor6EXw1UstrpTJzPoLKkppv46ULC94Mkt8t0z6OpFFoR0n21Eaq
- A Detailed Guide to Painting Diecast Car Models – https://livecarmodel.com/blog/a-detailed-guide-to-painting-diecast-car-models/?srsltid=AfmBOoqGDinAMj_lx4Lnr2AZGc7GcEZV7tFvfNEHE25hxqgXOj-jp7VU
- How to Paint Model Cars: Painting Tips & Guide – https://www.autoworldstore.com/blogs/tips-tricks/guide-to-painting-your-model-car?srsltid=AfmBOoqOVASMwGiw4QCWeuaXwzmJPNiAsHNU4ViuHWwmYICRI13WGrQC
- A Buyer’s Guide to Tools for Model Making | Get Started with Paints, Tools & Materials – https://www.wonderlandmodels.com/get-started/paints-tools-materials/a-buyers-guide-to-tools-for-model-making/
- A Detailed Guide to Painting Diecast Car Models – https://livecarmodel.com/blog/a-detailed-guide-to-painting-diecast-car-models/?srsltid=AfmBOopasbNNmDh1btihpoMvbgOy9yRWOwqcVb802idXB7Q7u-rjPOFK
- A simple way to paint a model car. – https://www.hobbytalk.com/threads/a-simple-way-to-paint-a-model-car.187881/
- A Detailed Guide to Painting Diecast Car Models – https://livecarmodel.com/blog/a-detailed-guide-to-painting-diecast-car-models/?srsltid=AfmBOoobhq9GpmvM0Vy9fnlY1fm1x8G2NMRvw4FxJy_D1UCHzjMNqDmT
- How to Paint Model Cars: Painting Tips & Guide – https://www.autoworldstore.com/blogs/tips-tricks/guide-to-painting-your-model-car?srsltid=AfmBOorpybXVZtOsFpnCisphboZS4ZhBY4QKM2mw15xmk3087MjgWzGc
- Acrylic vs. Enamel Paint for Scale Model Cars – https://www.autoworldstore.com/blogs/tips-tricks/acrylic-vs-enamel-paint-for-scale-models?srsltid=AfmBOop74QxLS9BcBhikNSYjiB1j4lhAkQDxJhhjIdHRuy7ANYqZNWFF
- A Detailed Guide to Painting Diecast Car Models – https://livecarmodel.com/blog/a-detailed-guide-to-painting-diecast-car-models/?srsltid=AfmBOorsVpJg_nX67SpMfF2f_Ck7lS0ZzHrjxOZHIJ7GtMWnYGghk8ZE
- How to Paint Model Cars: Painting Tips & Guide – https://www.autoworldstore.com/blogs/tips-tricks/guide-to-painting-your-model-car?srsltid=AfmBOopwmVDDn4_rMdJ50tGbUZ6OVCULFAik-haVsk5jgMkhtcf94HiP
- How to Paint Model Cars: Painting Tips & Guide – https://www.autoworldstore.com/blogs/tips-tricks/guide-to-painting-your-model-car?srsltid=AfmBOooTUlG0pBLBXM8LyCS2uki08A81-3GNe2SOBCA6KQ_GjOQaPEQb
- A Beginners Guide to Spotting Repainted or Restored Cars – https://www.planetdiecast.com/erik/index2.php?&option=com_content&task=view&id=86371&pop=1&page=0
- Spraying Flat Top Coat on Unpainted Models – Hobby Hovel – https://www.hobbyhovel.com/2010/08/tips-and-tricks-spraying-flat-top-coat-on-unpainted-models.html
- Model Car Tech: Paint Problems & Solutions – https://modeltech.tripod.com/paintprobs.htm
- What Is Paint Rash on Diecast Model Cars? – https://livecarmodel.com/blog/what-is-paint-rash-on-diecast-model-cars/
- A Guide to Master Diecast Car Customization – https://lasertransfersupplies.com/blogs/articles/guide-to-master-diecast-car-customization
- Why Do Car Enthusiasts Collect Diecast Cars? Is It A Good Hobby? – https://kinderlogs.in/blogs/diecast-cars/why-do-car-enthusiasts-collect-diecast-car-scale-models-is-it-a-good-hobby?srsltid=AfmBOooz6TWIdemF_HOXWo9SnRNLN91BJozz-HBx4w_Ksn2NXBNLfY6G


Interesting guide, but why spend time painting diecast cars? Wouldnt it be better investing in real car customizations? Just my two cents.
I appreciate the guide, but isnt the original paint job part of the diecast cars authenticity? Why mess with the manufacturers intent?
Interesting guide, but shouldnt there be a section on the types of paint to avoid for diecast cars?
Great guide! But, isnt it risky to paint diecast cars? Wont the value decrease with a custom paint job?