How to Lower Diecast Cars – DIY Guide
Affiliate links — we may earn a commission
A whopping 90% of diecast car fans have tried to tweak their mini vehicles. This fact shows the passion behind diecast car customization. Get ready to dive into the exciting world of lowering diecast cars1.
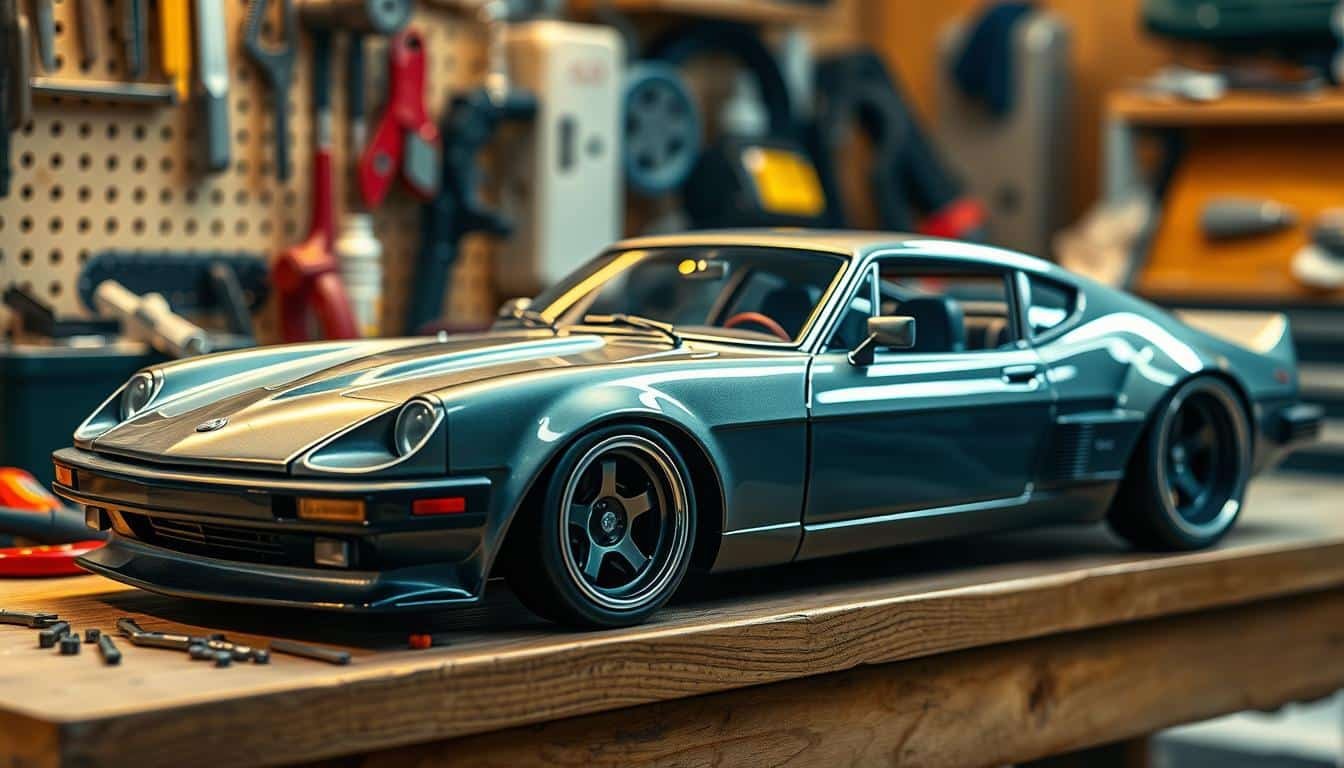
Lowering diecast cars turns ordinary replicas into eye-catching custom builds. This guide will help you achieve the perfect lowered look you’ve been dreaming of. We’ll cover subtle stance adjustments and radical low-rider styles.
We’ll explore the anatomy of your diecast model and advanced lowering techniques. You’ll learn how to take apart your car and modify its suspension. Then, you’ll put it back together with a cool new profile.
Get set to boost your diecast car game by bringing it closer to the ground!
Key Takeaways
- Lowering diecast cars enhances their visual appeal and uniqueness
- Proper tools and careful disassembly are crucial for successful modifications
- Various techniques exist for lowering, including suspension and axle adjustments
- Custom builds require patience and attention to detail
- Advanced modifications can create even more dramatic lowered effects
- Safety and preservation of the car’s integrity are important considerations
Understanding Diecast Car Anatomy and Disassembly
Modifying miniature marvels starts with understanding their anatomy. Let’s explore diecast chassis lowering and suspension modifications. These tweaks can transform your tiny vehicles into stunning showpieces.
Essential Tools and Materials Needed
Gather these tools before starting your diecast suspension modifications:
- Drill with 3/16 and 1/16 bits
- JB Kwik epoxy
- Mixing sticks
- Wax paper
- Small screwdvers
Aircraft Remover paint stripper works great for paint removal2. A Plano tackle box helps store tiny parts during disassembly.
Removing Body from Chassis
Carefully separate the body from the chassis. Look for small screws underneath or inside the model. Gently pry apart components, watching out for delicate parts like hood pins.
Separating Components and Parts Storage
Store disassembled parts in labeled containers. Use magnetic bowls for metal pieces. Avoid unnecessary disassembly to maintain value3.
Focus on exterior surfaces for cleaning and modifications. This approach preserves the car’s overall integrity while allowing for customization.
| Component | Storage Method | Care Instructions |
|---|---|---|
| Screws | Magnetic bowl | Keep sorted by size |
| Body panels | Padded container | Avoid scratching |
| Wheels | Foam block | Protect from dust |
Diecast car slammers demand patience and precision. Take your time during disassembly. This careful approach ensures a smooth reassembly later in your customization journey.
How to Lower Diecast Cars: Step-by-Step Process
Lowering diecast cars gives them a sleek, custom look. This guide will help you achieve the perfect stance for your models.
Front Suspension Modifications
Begin with the front suspension. For Maisto 1:24 scale models, the front axle swivels on two plastic studs.
To lower the front end, move the axle higher using spacers, blocks, nuts, or washers4. This can be tricky due to the engine and steerable front wheels4.
Rear Axle Adjustments
Rear end lowering is usually simpler. Place material strips in grooves to adjust the ride height4.
For some models like the VW Golf MK2, you might need to cut and move spindles. Use styrene spacers about 1/16” thick5.
Wheel and Tire Modifications
Sand tires for a realistic look and ensure proper clearance. Dry fitting is crucial to prevent alignment issues5.
Testing and Adjusting Ride Height
The final step involves trial and error. Test the ride height and adjust the interior tub or body as needed4.
Be careful, as some changes like slimming the axle can be hard to undo4.
| Modification Area | Difficulty Level | Key Considerations |
|---|---|---|
| Front Suspension | High | Engine presence, steering functionality |
| Rear Axle | Medium | Material thickness, groove placement |
| Wheels and Tires | Medium | Clearance, realistic appearance |
| Overall Ride Height | High | Balance, aesthetics, functionality |
Patience and precision are vital when lowering diecast cars. Take your time and measure carefully.
Enjoy customizing your miniature masterpieces6. The end result will be worth the effort.
Advanced Customization Techniques for Lowered Builds

Advanced techniques can transform your lowered diecast builds into stunning miniature masterpieces. These intricate modifications take your diecast car customization to new heights. Your creations will stand out with these expert methods.
Body Modifications and Wheel Well Adjustments
Carefully trim wheel wells to fit larger wheels and achieve a lower stance. Smooth edges with fine-grit sandpaper for a clean finish. Add Bare-Metal Foil to chrome elements for realistic details7.
Suspension Component Upgrades
Replace stock springs with custom-made, shorter versions to get the right ride height. Create functional rear suspensions by tweaking spring mounts and shocks. Use Tamiya primer before applying lacquer paint to these custom parts7.
Custom Chassis Modifications
Use donor parts from different models to achieve unique features. Adjust the chassis to fit new suspension components and the lowered body. Dry-brush details on the modified chassis for added depth and realism7.
Advanced customization demands patience and precision. Use hobby knives with various blade sizes for detailed work. Take your time to create exceptional lowered diecast builds.
Conclusion
Lowering diecast cars unleashes a world of creative possibilities. This challenging yet rewarding process enhances your customization skills. From basic tweaks to advanced modifications, each step brings you closer to stunning lowered builds.
Patience is crucial when working on miniature masterpieces. Take time to understand each component’s intricacies. As you progress, you’ll develop a keen eye for detail. This allows you to create unique, eye-catching models.
Don’t forget to capture your lowered diecast cars to showcase your hard work. Your photos will highlight the results of your dedication.
The diecast car customization world is vast and ever-changing. Most models are 1:63 to 1:24 scale, but smaller scales are gaining popularity8. Each project offers a chance to learn and improve your skills.
With dedication and creativity, you’ll soon create head-turning, one-of-a-kind lowered diecast cars. Your unique builds will stand out in any collection.
What are the main options for lowering diecast cars?
What essential tools do I need to lower a diecast car?
How do I modify the front suspension on a Maisto 1:24 scale model?
What’s involved in adjusting the rear axle for lowering?
How can I achieve a more realistic look when lowering my diecast car?
What advanced customization techniques can I use for lowered builds?
How do I ensure proper clearance when lowering a diecast car?
Can I use parts from different models to customize my diecast car?
How important is testing during the lowering process?
What’s the most challenging aspect of lowering diecast cars?
Source Links
- How to take apart Hot Wheels diecast cars – https://www.redlinederby.com/topic/how-to-take-apart-hot-wheels-diecast-cars/2
- How to custom paint Hot Wheels diecast cars – https://www.redlinederby.com/topic/how-to-custom-paint-hot-wheels-diecast-cars/1
- The Ultimate Guide to Cleaning Your Diecast Scale Model Collection – https://www.weissbrothers.us/the-ultimate-guide-to-cleaning-your-diecast-scale-model-collection/?srsltid=AfmBOop5NfG-2G91GlfyxSkiBfzVVkcSZG0xF-Rp_c3nU8PVmX44Tcps
- How to LOWER Maisto 1:24 scale diecast models-a simple… – https://www.diecastxchange.com/threads/how-to-lower-maisto-1-24-scale-diecast-models-a-simple-tutorial.72837/
- International Scale Modeller – https://intscalemodeller.com/viewtopic.php?t=1722
- How to make a 1/24 custom start to finish – https://www.diecastcrazy.com/threads/how-to-make-a-1-24-custom-start-to-finish.88775/
- A beginner’s guide to building plastic model car kits – https://finescale.com/how-to/2023/05/a-beginners-guide-to-building-plastic-model-cars
- Model car stores – why have they always shunned realistic R/C? – https://www.tamiyaclub.com/forum/index.php?/topic/27522-model-car-stores-why-have-they-always-shunned-realistic-rc/
Mike Callahan
Contributing writer covering diecast cars and figurines.


Nice guide, but why lower a diecast car? Isnt the beauty in its original form? Bit like defacing a masterpiece, right?
Anyone else think its risky to disassemble diecast cars, even with a guide? You risk losing the cars original integrity!
Dont you guys think using a heat gun during disassembly might risk damaging the cars paint job? Just a thought.
Great guide, but wouldnt it be better to include a section on proper safety precautions during the disassembly process?
So, arent we risking the cars integrity by disassembling it? Would love a guide on maintaining diecast car value too.